Wednesday, February 5, 2025
Free Small Woodworking Projects for Space-Saving Creations
Free Small Woodworking Projects for Space-Saving Creations
In contemporary living, maximizing space is paramount. Clutter can significantly impact the feeling of openness and tranquility in a home. Woodworking offers a unique avenue to address this challenge, allowing for the creation of aesthetically pleasing and functional space-saving solutions. This article explores several free, small woodworking projects designed to enhance your living space without sacrificing style or practicality. These projects are ideal for beginners and seasoned woodworkers alike, requiring only basic tools and readily available materials.

Wall-Mounted Floating Shelves
Floating shelves are a timeless solution for adding storage without the bulkiness of traditional shelving units. Their sleek design integrates seamlessly into any room, offering a versatile platform for displaying books, decorative items, or everyday essentials. This project involves minimal cutting and assembly, making it accessible even to novice woodworkers.
Materials Required:
- Two pieces of wood (e.g., pine, maple) of desired length and thickness. Consider using reclaimed wood for a rustic aesthetic.
- Wood screws (matching the wood type).
- Wood glue.
- Sandpaper (various grits).
- Wood stain or paint (optional).
- Measuring tape and pencil.
- Drill with drill bits.
- Level.
- Wall anchors (depending on wall type).
Construction Steps:
- Measure and cut: Accurately measure the desired length and cut the wood pieces to size. Ensure clean cuts for a professional finish.
- Sanding: Smooth the edges and surfaces of the wood using sandpaper, starting with coarser grits and progressing to finer ones for a silky touch. Pay attention to any imperfections.
- Finishing (Optional): Apply wood stain or paint for a personalized touch. Allow ample drying time before proceeding.
- Hidden Brackets: Install hidden shelf brackets on the back of the shelf. These brackets should be securely attached, supporting the weight of the intended items.
- Wall Installation: Carefully locate the studs in your wall to provide optimal support. Use a level to ensure the shelf is installed perfectly horizontal. Securely attach the brackets to the wall using appropriate wall anchors.
- Final Check: Test the shelf's stability to guarantee it can safely hold your items.
Compact Magazine Rack
A free-standing magazine rack can often occupy unnecessary floor space. A wall-mounted version elegantly solves this problem, keeping your reading materials organized and readily accessible while conserving valuable floor space.
Materials Required:
- Thin plywood or reclaimed wood for the main body.
- Small wooden dowels or strips for dividers (optional).
- Wood screws.
- Wood glue.
- Sandpaper.
- Wood stain or paint (optional).
- Measuring tape and pencil.
- Drill with drill bits.
- Wall anchors and screws.
Construction Steps:
- Design and Cut: Design your magazine rack, considering the number of magazines you wish to store. Cut the plywood or reclaimed wood according to your design.
- Assembly: Assemble the pieces using wood glue and screws. Ensure a secure and sturdy structure.
- Dividers (Optional): If using dividers, carefully install them to create separate compartments for magazines.
- Sanding and Finishing: Sand the entire rack smooth and apply wood stain or paint for a polished look.
- Wall Mounting: Attach sturdy mounting hardware to the back of the rack and secure it to the wall using appropriate wall anchors and screws.
Under-the-Bed Storage Boxes
The space under the bed is often underutilized. Custom-built storage boxes are a simple solution to maximizing this often-neglected area, keeping items organized and out of sight.
Materials Required:
- Plywood or sturdy cardboard (for strength and durability).
- Wood screws or heavy-duty staples.
- Wood glue (if using plywood).
- Sandpaper (if using plywood).
- Fabric or decorative paper (for lining – optional).
- Measuring tape and pencil.
Construction Steps:
- Measure the Space: Carefully measure the space under your bed to determine the dimensions of the storage boxes.
- Cut the Material: Cut the plywood or cardboard to the required dimensions. For plywood, ensure clean, precise cuts. If using cardboard, reinforce corners with additional layers.
- Assemble the Boxes: Assemble the boxes using screws, staples, and wood glue (if applicable). Ensure sturdy construction to support the weight of stored items.
- Sanding and Finishing (Plywood only): Sand any rough edges and apply a protective finish if using plywood.
- Lining (Optional): Line the inside of the boxes with fabric or decorative paper for an aesthetic upgrade and to protect stored items.
Small Wooden Organizer for Desk or Countertop
A compact wooden organizer can significantly declutter a workspace, providing designated spaces for pens, pencils, and other small items. This project is relatively straightforward, perfect for beginners, and offers considerable customization options.
Materials Required:
- Small pieces of wood (e.g., scrap wood).
- Wood glue.
- Small wood screws or nails.
- Sandpaper.
- Wood stain or paint (optional).
- Measuring tape and pencil.
Construction Steps:
- Design and Cut: Design the organizer, considering compartments for various items. Cut the wood pieces accordingly.
- Assembly: Assemble the compartments using wood glue and screws or nails. Ensure a strong and stable structure.
- Sanding and Finishing: Sand down any rough edges and apply wood stain or paint for a polished finish. Allow sufficient drying time.
These are just a few examples of the numerous space-saving woodworking projects that can be undertaken at minimal cost. Remember that creativity and ingenuity are key. By repurposing scrap wood and employing simple techniques, you can transform your living space and create functional and aesthetically pleasing additions to your home. Remember always to prioritize safety and use appropriate protective gear when working with woodworking tools.
Simple Furniture Plans for Effortless DIY Projects
Simple Furniture Plans for Effortless DIY Projects
Tired of generic, mass-produced furniture? Do you crave unique pieces that reflect your personal style but balk at the price tag of custom-made items? Then unleash your inner craftsman and embark on a rewarding DIY journey! This guide provides simple furniture plans for effortless projects, perfect for beginners and seasoned DIY enthusiasts alike. We'll focus on straightforward designs and readily available materials, ensuring a stress-free experience from start to finish. Prepare to transform your living space with pieces you built yourself!

Beginner-Friendly Projects: A Perfect Starting Point
For first-time DIYers, selecting the right project is crucial. Starting with something manageable builds confidence and prevents frustration. Avoid overly complex designs with intricate joinery. Instead, focus on projects that utilize basic tools and techniques. These simple projects will not only furnish your home but also teach you valuable skills for future, more ambitious undertakings.

The Classic Floating Shelf
Floating shelves are incredibly versatile and surprisingly easy to build. You'll need only a few pieces of wood (choose a readily available wood like pine or poplar), screws, and a sturdy wall anchor. Cut the wood to your desired dimensions. Pre-drill holes to prevent the wood from splitting, and then carefully attach the shelf to the wall. Sand the edges for a smooth finish, and voila! You have a stylish and functional floating shelf, perfect for displaying books, plants, or decorative items. This project takes only a couple of hours, leaving you with a sense of accomplishment and a beautifully crafted shelf.
A Simple Side Table
A simple side table provides another excellent beginner project. Use four sturdy legs (pre-made legs are readily available online or at hardware stores) and a single piece of wood for the tabletop. Attach the legs using wood glue and screws, ensuring they are evenly spaced and securely fastened. Sand the edges and corners for a smooth finish. Consider staining or painting the table to personalize its appearance. This project, while slightly more involved than the floating shelf, offers a tangible sense of achievement and a practical addition to your home. You will have mastered basic woodworking techniques and be equipped for more ambitious projects.
Intermediate Projects: Stepping Up Your Game
Once you've mastered the basics, you can venture into slightly more challenging projects that showcase more advanced techniques. These projects allow you to experiment with different styles and incorporate more complex joinery methods. Remember to always prioritize safety and precision while working with power tools.
A Rustic Bench
Building a rustic bench involves creating a simple frame from 2x4s or similar lumber and then attaching wider planks for the seat. You can employ techniques like pocket holes for added strength and a cleaner look. Remember to appropriately sand and finish the wood, and consider adding a backrest for extra comfort. Choose a rustic finish to complement a natural or farmhouse-style aesthetic. The accomplishment of building something both beautiful and functional will be immensely rewarding.
A Basic Coffee Table
Constructing a basic coffee table allows you to experiment with different materials and finishes. Consider using plywood for the tabletop and simple, sturdy legs. You might explore different leg styles, from straight legs to tapered or even hairpin legs. Secure the legs using robust joinery, such as dowels or screws. This project offers ample opportunity for personalization and customization, allowing you to create a unique piece that perfectly complements your living room.
Essential Tips for Success
Regardless of your chosen project, remember these crucial tips for a successful DIY experience:
- Plan meticulously: Carefully study the plans and gather all necessary materials before starting.
- Prioritize safety: Always wear appropriate safety gear, including eye protection and dust masks.
- Take your time: Rushing can lead to mistakes. Work methodically and carefully.
- Embrace imperfections: Handcrafted items often possess unique charm. Don't strive for absolute perfection.
- Have fun! DIY projects should be enjoyable. Relax, be creative, and appreciate the process.
With a little patience, planning, and a dash of creativity, you can transform your home with stunning, handmade furniture. So, grab your tools, gather your materials, and start building!
Furniture Woodworking Projects for Home and Office Designs
Furniture Woodworking Projects for Home and Office Designs

Transforming Your Home with Custom Wood Furniture
The scent of freshly cut wood, the satisfying whir of the planer, the smooth curve of a hand-carved detail – woodworking offers a unique blend of creativity and craftsmanship. Turning raw lumber into functional and beautiful pieces for your home is incredibly rewarding. But beyond the personal satisfaction, crafting your own furniture allows for unparalleled customization. You can choose the exact dimensions, the specific wood type (from rustic reclaimed pine to sleek modern walnut), and the style to perfectly match your aesthetic. Forget mass-produced pieces; create furniture that reflects your individual personality and elevates your living space. This journey begins with choosing the right project, one that challenges you yet remains achievable based on your skill level. From simple shelves to intricate desks, we'll explore projects to inspire your next woodworking endeavor.
Easy Woodworking Projects for Beginners

Simple Floating Shelves
Begin your woodworking journey with a project that builds confidence. Floating shelves are remarkably versatile and straightforward to construct. You'll learn fundamental techniques like measuring accurately, cutting straight lines, and using simple joinery. Choose a visually appealing wood like maple or cherry for a clean, modern look, or opt for a reclaimed wood for a rustic feel. Remember to pre-drill pilot holes before screwing to prevent splitting, a crucial tip for any beginner woodworker. Once installed, these shelves effortlessly showcase your books, plants, or decorative items, adding a touch of personalized style to any room.
Rustic Coffee Table
Embrace the charm of rustic design with a DIY coffee table. This project allows you to experiment with different wood types and finishes. Consider using reclaimed barn wood for a truly unique piece with character or opt for more readily available lumber like pine or fir. A simple design with sturdy legs and a thick top is both practical and aesthetically pleasing. Sanding down the wood to a smooth finish and applying a protective sealant are crucial steps to ensure longevity and enhance the beauty of the wood grain.
Intermediate Woodworking Projects: Stepping Up Your Game
Classic Farmhouse Table
Take your skills to the next level with a classic farmhouse table. This project will challenge you with more complex joinery techniques, such as mortise and tenon joints or even dowel joints. Careful planning and precise measurements are key to success here. The satisfying process of assembling the table, seeing the pieces fit together perfectly, is incredibly rewarding. Choosing a durable wood like oak or hickory ensures the table will withstand years of family dinners and gatherings. Consider adding a custom finish, such as a distressed paint or a clear coat to highlight the natural beauty of the wood.
Modern Desk with Drawers
A modern desk is a practical and stylish addition to any home office or workspace. This project involves creating drawers, which requires accurate measurements and precise joinery for smooth operation. Consider using dovetail joinery for a truly professional look, although rabbet and dado joints provide excellent alternatives for intermediate woodworkers. Choose a sleek wood like walnut or maple and incorporate clean lines and minimalist design elements. A well-built desk not only provides a functional workspace but also serves as a statement piece, reflecting your commitment to quality craftsmanship.
Advanced Woodworking Projects: Masterful Creations
Intricate Bookcase with Arched Top
For the experienced woodworker, a bookcase with an arched top presents a rewarding challenge. This project requires advanced skills in woodworking, such as creating curved components and advanced joinery techniques. The beautiful arc at the top adds a touch of elegance, showcasing your mastery of the craft. Plan carefully, ensuring you have the appropriate tools and equipment, including a router and potentially a bandsaw for shaping the curved elements. The finished piece serves as both a functional storage solution and a stunning focal point.
Custom Built-in Cabinetry
The ultimate woodworking challenge: building custom cabinetry. This project demands meticulous planning, precise measurements, and expert woodworking skills. From designing the layout to crafting intricate details, you'll need to master various techniques including complex joinery, door and drawer construction, and precise finishing. The result? Bespoke cabinetry that perfectly integrates with your home's design, showcasing your exceptional woodworking abilities and providing a stunning feature for years to come. This project is a true testament to the art of woodworking.
Sunday, February 2, 2025
Woodworking Projects for Beginners to Get Started with Ease
Unlock Your Inner Craftsperson: Easy Woodworking Projects for Beginners
Stepping into the world of woodworking can feel daunting, but it doesn't have to be! With a little patience and the right project, you can quickly discover the satisfaction of crafting something beautiful and functional with your own two hands. This guide focuses on beginner-friendly projects that require minimal tools and skills, allowing you to build confidence and develop your woodworking abilities at your own pace. Forget complicated joints and intricate designs – we're starting with the basics, ensuring a fun and rewarding experience from the very first cut.

Simple Shelves: A Foundation of Functionality
Shelves are an excellent starting point for any aspiring woodworker. They're functional, relatively easy to construct, and offer plenty of opportunity to personalize your design. Choose a simple design, like a floating shelf or a basic wall-mounted unit. For your first attempt, consider using pre-cut lumber from your local hardware store to simplify the process. You'll primarily focus on measuring, cutting (using a miter saw or hand saw), and securing the pieces using wood glue and screws. Remember to pre-drill pilot holes to prevent the wood from splitting. Sanding the edges smooth and applying a finish (like stain or varnish) will add a professional touch. Don't be afraid to experiment with different wood types and stains to create unique shelving solutions for your home.

Materials You'll Need:
- Pre-cut lumber (pine or similar softwood is a good choice)
- Wood glue
- Screws
- Drill with drill bits
- Measuring tape
- Saw (mitre saw or hand saw)
- Sandpaper
- Wood finish (stain or varnish)
A Coasters Set: Small Project, Big Impact
If you want an even smaller, quicker project to build your confidence, a set of coasters is the perfect choice. This project allows you to experiment with different wood types, stains, and finishes without requiring advanced woodworking skills. You can easily cut square or round pieces from scrap wood, sand them to a smooth finish, and apply a protective sealant. To add a personal touch, consider burning a simple design into the wood or using colored resin for a unique look. This project's small scale allows for quick iterations, letting you hone your skills and learn from any mistakes without investing a significant amount of time or material.
Getting Started:
- Choose your wood: Hardwoods like maple offer a beautiful, durable option, while softer woods like balsa are easier to work with for beginners.
- Cut the pieces: Use a jigsaw or even a sharp utility knife for precise cuts.
- Sand smooth: Pay careful attention to removing any sharp edges for a polished finish.
- Apply a finish: This protects your coasters and adds a touch of elegance.
Simple Birdhouse: A Touch of Nature
Building a birdhouse is a rewarding project that combines functionality with aesthetic appeal. Opt for a simple design, focusing on basic cuts and joints. You can find numerous free plans online to guide you through the process. This project is great for practicing measuring, cutting, and assembling pieces, while also introducing you to the use of nails or screws for construction. Remember to leave appropriate ventilation holes and a suitable entrance size for your chosen bird species. Painting the birdhouse adds a fun, personalized element. The satisfaction of attracting birds to your backyard is an extra reward for your efforts.
Remember, starting small is key. These projects offer a great introduction to the world of woodworking, allowing you to develop essential skills and build your confidence before tackling more ambitious projects. Enjoy the process, celebrate your successes, and don't be afraid to embrace the learning curve – that's part of the fun!
Saturday, February 1, 2025
Sideboard Woodworking Plans for Modern Storage Solutions
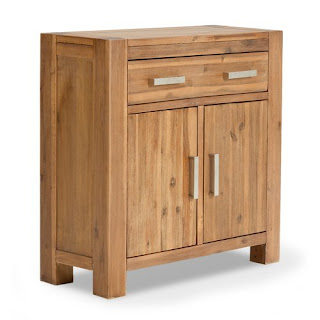
Sideboard Woodworking Plans for Modern Storage Solutions
The sideboard, a timeless piece of furniture, transcends mere storage functionality. It serves as a focal point, a statement piece that reflects both personal style and the inherent artistry of woodworking. This comprehensive guide delves into the design and construction of modern sideboards, providing detailed plans and considerations for crafting a bespoke piece that perfectly complements contemporary interiors. We will explore diverse design options, material selections, and construction techniques to enable even intermediate woodworkers to create a stunning and functional sideboard.

Design Considerations for Modern Sideboards
Before embarking on the construction, meticulous planning is crucial. A well-defined design process ensures the final product meets both aesthetic and practical requirements. Several key aspects must be addressed:
Style and Aesthetics
Modern sideboards are characterized by clean lines, minimalist aesthetics, and a focus on functionality. Popular styles include mid-century modern with tapered legs and simple geometric forms; Scandinavian designs featuring light-colored wood and understated elegance; and minimalist designs prioritizing clean lines and lack of ornamentation. Consider the overall aesthetic of your living space to select a style that complements the existing decor. Consider incorporating elements such as recessed handles, floating shelves, or contrasting materials to add visual interest.
Dimensions and Functionality
The dimensions of your sideboard should be carefully planned based on the available space and intended use. Consider the following factors:
- Height: Standard sideboard heights range from 30 to 36 inches, but this can be adjusted to suit your needs.
- Width: The width should be proportionate to the available wall space and the amount of storage required.
- Depth: A depth of approximately 18 to 24 inches is typical, allowing for sufficient storage while maintaining a sleek profile.
- Storage Capacity: Determine the number and size of drawers and shelves needed to accommodate your storage needs. Consider incorporating different sized compartments for varying items.
Material Selection
The choice of wood significantly impacts the final look and feel of the sideboard. Hardwoods such as walnut, cherry, oak, and maple are popular choices due to their durability, rich color, and ability to accept finishes well. Softwoods like pine can also be used, but they may require more care and maintenance. Consider the wood's color, grain pattern, and overall aesthetic to match your desired style. The use of plywood for the carcass can significantly improve structural integrity and reduce the cost of materials. Consider combining different wood species for contrasting visual effects.
Detailed Construction Plans
The following steps outline a general approach to constructing a modern sideboard. Specific dimensions and details will need to be adjusted based on your chosen design.
Cutting and Preparation
Begin by creating detailed drawings with precise dimensions for each component: side panels, top and bottom panels, shelves, drawer fronts, and back panel. Use a high-quality table saw, miter saw, or circular saw to accurately cut the wood to these dimensions. Sand all cut pieces thoroughly to a smooth finish using progressively finer grit sandpaper. Ensure the surfaces are clean and free of dust before proceeding.
Assembly of the Carcass
The sideboard carcass is typically constructed using pocket hole joinery, dowel joinery, or mortise and tenon joinery. Pocket hole joinery is a relatively simple and effective method for joining the side panels, top, and bottom. Apply wood glue to all joint surfaces and clamp firmly until the glue is dry. Pre-drill pilot holes to prevent splitting when driving screws. Ensure the carcass is square and true using a square and level.
Installation of Shelves and Drawers
Once the carcass is assembled, install shelves using shelf supports or dadoes. Dadoes provide a more robust and aesthetically pleasing solution, but require more advanced woodworking skills. For drawers, construct the drawer boxes using dovetail joinery, rabbet and dado joinery, or simple butt joints reinforced with screws and glue. Install drawer slides, ensuring smooth and effortless operation. Attach drawer fronts, carefully aligning them with the drawer boxes.
Finishing Touches
Once the carcass, shelves, and drawers are in place, sand all surfaces again to ensure a perfectly smooth finish. Apply a suitable finish, such as varnish, lacquer, or oil, to protect the wood and enhance its natural beauty. Multiple coats may be necessary, sanding lightly between coats to achieve a flawless finish. Install handles, knobs, or other hardware, ensuring they are securely attached and aesthetically pleasing.
Adding Refinements
To further elevate the design, consider incorporating additional details such as:
- Floating Shelves: Create a visually appealing floating shelf above the sideboard for displaying decorative items.
- Recessed Handles: Integrate recessed handles for a sleek, minimalist look.
- Integrated Lighting: Install LED strip lighting underneath the sideboard to create a dramatic effect and highlight the piece.
- Customizable Interior: Design adjustable shelving or dividers within the sideboard to accommodate varying storage needs.
Safety Precautions
Woodworking involves the use of power tools and sharp instruments; therefore, safety precautions are paramount. Always wear appropriate safety gear, including eye protection, hearing protection, and a dust mask. Ensure that all tools are properly maintained and used according to the manufacturer's instructions. Work in a well-ventilated area to avoid inhaling wood dust.
Conclusion
Crafting a custom sideboard is a rewarding experience that allows you to create a unique and functional piece of furniture that perfectly complements your home. By carefully considering design elements, selecting appropriate materials, and following detailed construction plans, you can build a stunning modern sideboard that will be admired for years to come. Remember that patience and attention to detail are key to achieving professional-quality results. Embrace the process, learn from each step, and enjoy the satisfaction of creating something beautiful and enduring with your own hands.
Friday, January 31, 2025
Do-It-Yourself Woodworking Plans for Every Skill Level and Project
Unleash Your Inner Craftsperson: DIY Woodworking Plans for Every Skill Level
The satisfying scent of freshly cut wood, the smooth feel of handcrafted furniture, the pride of creating something beautiful and functional with your own two hands – these are the rewards that await you in the world of woodworking. Whether you're a seasoned artisan or a complete novice, the realm of DIY woodworking offers endless possibilities. This guide provides a comprehensive overview of readily available woodworking plans, categorized by skill level, to help you find your perfect project and embark on your woodworking journey.

Beginner-Friendly Projects: Building Confidence with Simple Crafts
Starting your woodworking adventure doesn't require a massive workshop or years of experience. Numerous easy-to-follow plans cater specifically to beginners, helping you build confidence and master fundamental techniques. These projects often involve straightforward cuts, basic joinery, and readily available materials. They focus on building your skills in measuring, cutting, sanding, and finishing, providing a solid foundation for more advanced projects.

Simple Shelves and Coat Racks:
These projects are ideal for learning to use measuring tapes, saws, and drills accurately. They allow you to practice cutting wood to precise dimensions and using simple joinery methods like screwing or nailing. The results are instantly gratifying and immediately useful additions to your home.
Birdhouses and Feeder Stations:
Creating a birdhouse or feeder is a delightful introduction to woodworking. These plans often feature simple shapes and require fewer tools, making them perfect for first-timers. You'll learn about basic carpentry techniques while contributing to the beauty of your garden.
Small Wooden Boxes:
Constructing small wooden boxes teaches essential skills like miter cuts and using wood glue. Choose plans with simple designs, and practice your sanding and finishing techniques for a polished, professional-looking result.
Intermediate Projects: Refining Your Skills and Expanding Your Creativity
Once you've mastered the basics, it's time to graduate to intermediate projects that challenge your skills and allow for more creative expression. These projects often involve more complex cuts, advanced joinery techniques like mortise and tenon, and the incorporation of multiple materials.
Coffee Tables and End Tables:
Building a coffee or end table necessitates precise measurements, skillful cutting, and potentially the use of more advanced joinery methods. This project will hone your skills in assembling larger structures and working with various wood types and finishes.
Simple Bookshelves:
Constructing bookshelves involves planning for structural integrity, incorporating shelves, and potentially adding decorative elements. This project will solidify your understanding of wood strength, bracing techniques, and finish application.
Outdoor Benches and Planters:
Outdoor furniture projects introduce the challenges of working with weather-resistant materials and building for durability. These plans often incorporate more complex joinery and finishing techniques, further developing your woodworking expertise.
Advanced Projects: Mastering Complex Techniques and Designing Your Own Creations
For experienced woodworkers, the possibilities are virtually limitless. Advanced projects often involve intricate designs, custom joinery, and the use of specialized tools. This level allows you to push your creative boundaries and develop your unique style.
Custom Cabinets and Dressers:
Building custom cabinetry demonstrates mastery of a wide range of skills, including precise measurements, complex joinery, the incorporation of hardware, and impeccable finishing. This project is a testament to advanced woodworking abilities.
Detailed Furniture Pieces:
Creating intricate chairs, tables with elaborate details, or other complex furniture pieces requires a deep understanding of woodworking techniques, design principles, and the ability to troubleshoot challenges effectively. These projects showcase exceptional craftsmanship.
Building Your Own Workshop Furniture:
Constructing your own workbench, tool storage systems, or other workshop accessories represents the pinnacle of woodworking expertise. It demonstrates not only skill but also a comprehensive understanding of workshop efficiency and ergonomics. This is a project truly built by a master craftsman.
Regardless of your skill level, remember that the journey of woodworking is as rewarding as the finished product. Start with a project that excites you, embrace the learning process, and celebrate each accomplishment along the way. Happy woodworking!
Free Woodworking Projects for Crafting Beautiful Designs
Free Woodworking Projects for Crafting Beautiful Designs
The inherent beauty of wood, coupled with the satisfying process of creation, makes woodworking a deeply rewarding hobby. For those seeking to explore this craft without significant financial investment, numerous free woodworking projects offer a pathway to crafting beautiful and functional designs. This article explores a selection of such projects, categorized for ease of navigation, ranging from beginner-friendly endeavors to those demanding more advanced skills. Each project description provides a detailed overview, outlining the necessary materials, tools, and a step-by-step approach to successful completion.

Beginner-Friendly Projects: Building Confidence and Skill
For individuals new to woodworking, selecting a project that balances simplicity with aesthetic appeal is crucial for fostering both skill and enthusiasm. The following projects offer a gentle introduction to the fundamentals of woodworking, requiring minimal tools and readily available materials.

Simple Wooden Coasters
This project is perfect for beginners, requiring only basic tools and readily available materials. Materials: Scraps of hardwood (e.g., cherry, maple, walnut), sandpaper (various grits), wood finish (e.g., polyurethane, varnish), felt pads. Tools: Hand saw or jigsaw, drill with a small drill bit, sanding block. Instructions: Cut the wood into squares or circles of your desired size. Sand the edges and surfaces smooth. Apply the wood finish according to the manufacturer's instructions. Attach felt pads to the bottom of each coaster to protect surfaces. This project introduces fundamental skills like measuring, cutting, sanding, and finishing, setting a solid foundation for more complex endeavors.
A Rustic Wooden Shelf
A simple floating shelf provides practical storage and a decorative element. Materials: One piece of hardwood (length and width based on desired shelf size), wood screws, wall anchors (appropriate for your wall type), wood stain or paint (optional). Tools: Measuring tape, pencil, drill, screwdriver, level. Instructions: Measure and mark the shelf's location on the wall. Drill pilot holes for the screws, ensuring they are correctly aligned and anchored securely to the wall studs. Attach the shelf to the wall, ensuring it is level. This project introduces the use of power tools and provides practical experience in accurate measuring and wall mounting.
Wooden Key Holder
A charming and functional key holder is another excellent beginner project. Materials: Small piece of hardwood, hooks (suitable for wood), wood glue, wood finish. Tools: Hand saw or jigsaw, drill, sandpaper. Instructions: Cut the wood to your desired shape and size. Drill holes to accommodate the hooks. Secure the hooks using wood glue and screws. Sand the surface smooth and apply a wood finish. This project hones skills in drilling and using wood glue, while emphasizing the importance of accurate measurements.
Intermediate Projects: Expanding Your Skillset
Once a solid foundation is established, intermediate projects allow for the exploration of more complex joinery techniques and refined design elements.
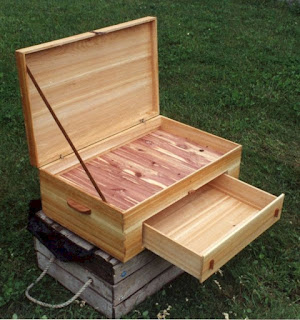
A Simple Wooden Box with Lid
Constructing a small wooden box with a lid introduces more intricate joinery techniques. Materials: Hardwood boards (sufficient for the box sides, bottom, and lid), wood glue, wood screws or brads, hinges, wood finish. Tools: Hand saw or jigsaw, drill, clamps, sandpaper. Instructions: Cut the wood pieces to the correct dimensions. Create joints (e.g., butt joints, rabbet joints) to assemble the box. Attach the hinges to the lid and box. Sand the entire piece smooth and apply the chosen finish. This project develops precision cutting, assembly, and joinery skills.
A Birdhouse
Creating a birdhouse offers a blend of creativity and practical application. Materials: Untreated wood (e.g., pine or cedar), wood glue, nails or screws, wood stain or paint (optional). Tools: Hand saw or jigsaw, hammer or screwdriver, drill (for ventilation holes), sandpaper. Instructions: Carefully cut the wood pieces according to the chosen birdhouse design. Assemble the pieces using glue and nails or screws, ensuring a weather-resistant structure. Drill ventilation holes. Add a perch (optional). Apply a finish (optional). This project encourages creative design while demanding careful construction.
A Small Wooden Planter Box
This project combines woodworking skills with gardening, resulting in a beautiful and functional addition to any outdoor space. Materials: Untreated wood (e.g., cedar or redwood), wood glue, screws, waterproof sealant, landscaping fabric (optional). Tools: Hand saw or jigsaw, drill, screwdriver, sandpaper. Instructions: Cut the wood pieces to the required dimensions. Assemble the planter box using wood glue and screws, ensuring it is watertight. Apply a waterproof sealant to protect the wood from moisture damage. Line the interior with landscaping fabric (optional) to prevent soil from leaching out. This project provides experience in building a watertight structure and understanding the considerations for outdoor projects.
Advanced Projects: Mastering Techniques and Design
Advanced woodworking projects challenge the craftsman's skills, requiring a broader knowledge of joinery, finishing techniques, and complex designs.
A Detailed Wooden Toy
Creating a detailed wooden toy, such as a rocking horse or a toy car, demands precision, patience, and advanced woodworking techniques. Materials: Hardwood or plywood (depending on the design), wood glue, screws or dowels, paint or stain, sandpaper. Tools: Hand saw or jigsaw, chisel, drill, router (possibly), sanding block, clamps. Instructions: The complexity of this project requires detailed plans and a methodical approach. Precise cutting, accurate joinery, and careful assembly are crucial for creating a safe and functional toy. This project hones skills in advanced joinery and intricate design.
A Wooden Chair
Constructing a wooden chair is a significant undertaking, requiring extensive planning, precision cutting, and skilled joinery. Materials: Hardwood (e.g., oak, maple, beech), wood glue, screws or dowels, wood finish. Tools: Hand saw or jigsaw, chisel, drill, router, clamps, mortise and tenon jig (recommended). Instructions: A detailed plan and thorough understanding of joinery techniques are essential for this complex project. The construction involves intricate cuts, precise mortise and tenon joints, and careful assembly. This project is a significant challenge, providing a sense of accomplishment and a deeply rewarding outcome. The project is ideal for the seasoned woodworker.
Disclaimer: Always prioritize safety when undertaking woodworking projects. Ensure you have the appropriate safety equipment, such as eye protection and dust masks. Follow all safety guidelines provided by the tool manufacturers. Consult detailed plans and instructions before starting any project. These project descriptions serve as a general guide; the specific materials and tools may vary based on the chosen design and available resources.